
Sleeping Fox — Free Amigurumi Pattern
A free crochet amigurumi fox pattern with round-by-round instructions, stitch counts and assembly. Worsted weight, 3.5 mm hook, about 14 cm tall when finished.
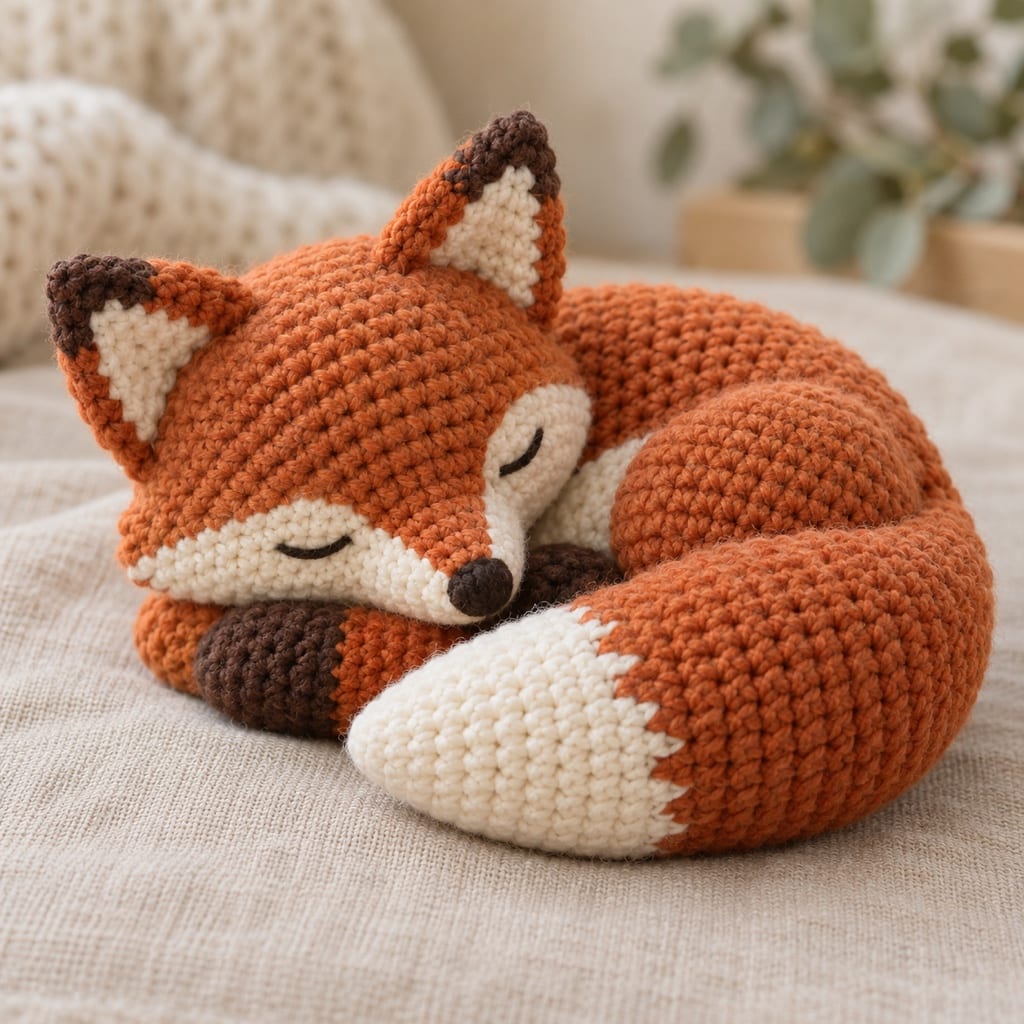
- Difficulty
- beginner
- Yarn weight
- worsted
- Hook
- 3.5 mm
- Finished size
- 14 cm
A compact fox worked in a spiral, with no seams to sew closed except where the parts join. If this is your first amigurumi, the head and body are the same shape at two sizes — make the body first and the head will feel familiar.
Before you start
Work in a continuous spiral without joining rounds, and move a stitch marker up as you go.
Every dec is an invisible decrease. Numbers in
brackets are the stitch count at the end of the round.
Abbreviations: MR magic ring · sc single crochet · inc two sc in one stitch · dec invisible decrease · st stitch.
Gauge is not critical, but the fabric should be dense enough that stuffing does not show through. If it does, drop to a 3 mm hook.
Head (rust orange)
- Round 1: 6 sc in MR [6]
- Round 2: inc in each st around [12]
- Round 3: [sc 1, inc] 6 times [18]
- Round 4: [sc 2, inc] 6 times [24]
- Round 5: [sc 3, inc] 6 times [30]
- Rounds 6–10: sc in each st around [30]
Place the safety eyes between rounds 7 and 8, about 6 stitches apart.
- Round 11: [sc 3, dec] 6 times [24]
- Round 12: [sc 2, dec] 6 times [18]
- Round 13: [sc 1, dec] 6 times [12]
Stuff firmly — firmly enough that the head holds its shape when you squeeze it.
- Round 14: dec 6 times [6]
Fasten off, leaving a long tail. Close the remaining hole with a yarn needle.
Body (rust orange, cream from round 5)
- Round 1: 6 sc in MR [6]
- Round 2: inc in each st around [12]
- Round 3: [sc 1, inc] 6 times [18]
- Round 4: [sc 2, inc] 6 times [24]
- Rounds 5–11: sc in each st around [24]
Work rounds 5 to 11 in cream across the front 10 stitches and rust across the back 14 to give the fox its pale belly, carrying the unused colour inside the work.
- Round 12: [sc 2, dec] 6 times [18]
- Round 13: [sc 1, dec] 6 times [12]
Stuff, keeping the shape slightly egg-like rather than round.
- Round 14: dec 6 times [6]
Fasten off, leaving a long tail for sewing.
Ears — make 2 (rust orange, dark brown tip)
- Round 1: 4 sc in MR [4]
- Round 2: [sc 1, inc] 2 times [6]
- Round 3: sc in each st around [6]
- Round 4: [sc 2, inc] 2 times [8]
- Round 5: sc in each st around [8]
Fasten off with a long tail. Do not stuff — flatten the ear before you sew it on. Work round 1 in dark brown if you want tipped ears.
Legs — make 4 (dark brown)
- Round 1: 6 sc in MR [6]
- Round 2: [sc 1, inc] 3 times [9]
- Rounds 3–6: sc in each st around [9]
Fasten off with a long tail. Stuff lightly — the legs should stay soft enough to fold under the body.
Tail (rust orange, cream from round 7)
- Round 1: 6 sc in MR [6]
- Round 2: [sc 2, inc] 2 times [8]
- Round 3: sc in each st around [8]
- Round 4: [sc 3, inc] 2 times [10]
- Rounds 5–9: sc in each st around [10]
- Round 10: [sc 3, dec] 2 times [8]
Switch to cream at round 7 for a white tail tip. Stuff lightly and fasten off with a long tail.
Assembly
Sew the head to the body across rounds 12 and 13 of the body, tilting it slightly forward so the fox looks like it is dozing. Pin before you sew — the angle of the head is what gives the piece its character, and it is much easier to move a pin than to unpick a seam.
Attach the ears to rounds 4 and 5 of the head, about 8 stitches apart, with the flattened edge curving forward.
Sew the front legs to the sides of the body at round 10, folded slightly under. Sew the back legs at round 12, angled forward so the fox sits without tipping.
Sew the tail to the back of the body at round 11 and curl it around one side.
Embroider a small dark brown nose over rounds 1 to 3 of the head, and two short closed-eye lines in dark brown if you prefer a sleeping fox to one with safety eyes.
Making it a different size
Every stitch count here scales together. For a 21 cm fox, start each piece from a 9-stitch magic ring instead of 6 and scale every round by 1.5 — the pattern resizer will do the arithmetic and rewrite the increase rounds for you.